 Save
Save My sister called me on a gray February afternoon asking if I could bring something special to her Valentine's Day brunch. I found myself standing in my kitchen, holding a jar of candied orange peel I'd bought on impulse weeks earlier, suddenly inspired. These scones came together almost by accident—that happy kind where tart cranberries and sweet citrus found their perfect harmony in buttery, tender crumbs. One bite and I knew I'd be making them again, probably before Valentine's Day even arrived.
I still remember my friend Sarah's expression when she bit into one of these at the brunch table. She closed her eyes for a second, and without saying anything, I knew the candied orange peel had done its job—it wasn't just sweet, it was bright, like someone had captured winter sunshine and baked it into dough.
Ingredients
- All-purpose flour (2 cups): The foundation that keeps these scones tender rather than tough; don't sift unless your flour is visibly lumpy, as overworking the dry ingredients is the enemy here.
- Granulated sugar (1/4 cup): Just enough sweetness to let the fruit shine without making these taste like dessert for breakfast.
- Baking powder (1 tablespoon): Your lift and rise, so make sure it's fresh—old baking powder won't give you those tender layers.
- Fine sea salt (1/2 teaspoon): Balances everything and makes the citrus notes pop on your palate.
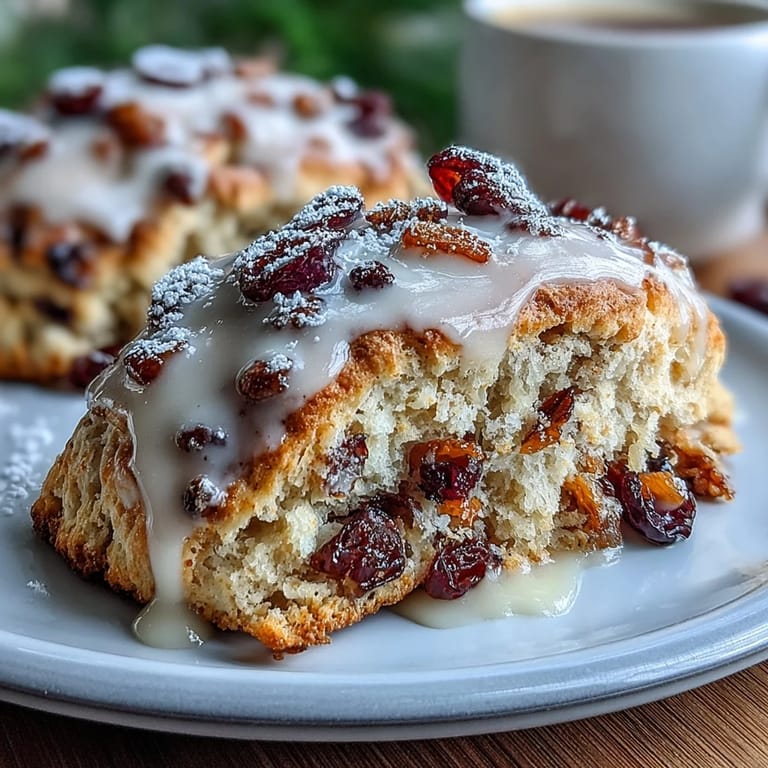
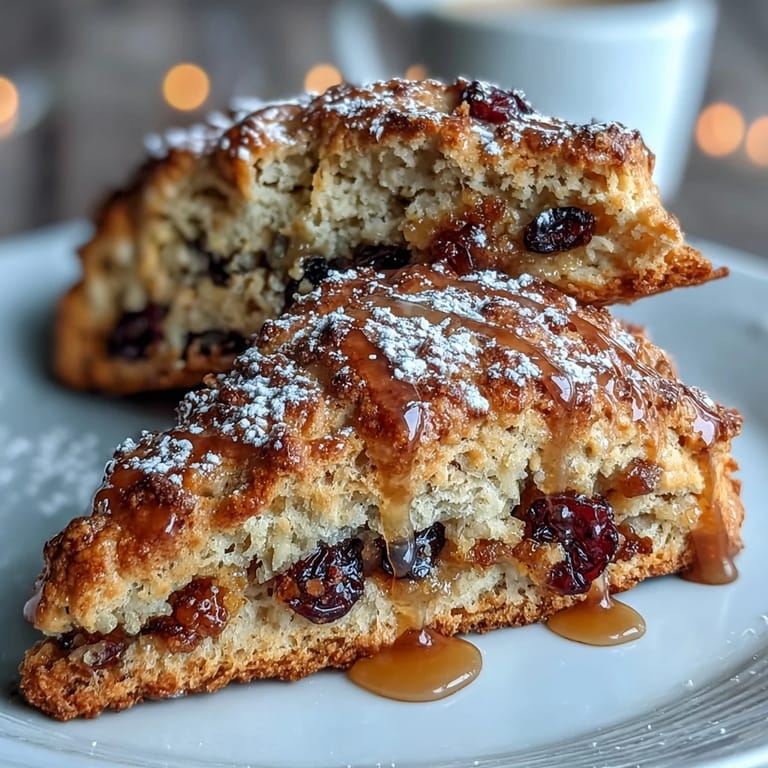
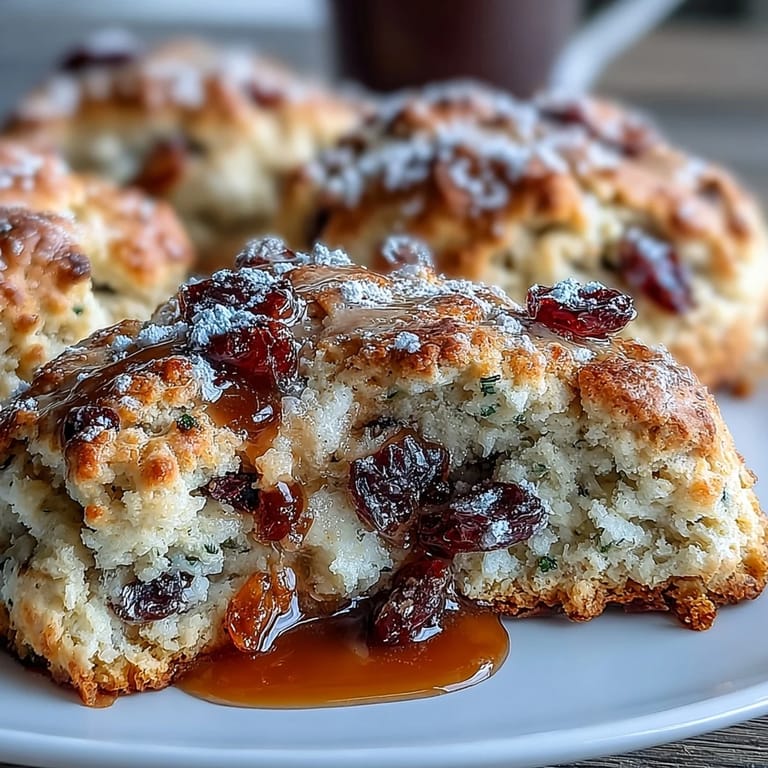
- Dried cranberries (1/2 cup): The tart backbone that keeps the scones from feeling one-dimensional; if they seem hard, a quick soak in warm water plumps them beautifully.
- Candied orange peel (1/3 cup, finely chopped): The star ingredient—its bittersweet edge transforms these from ordinary to memorable, though homemade versions vary in sweetness, so taste a piece first.
- Orange zest (from 1 orange): Fresh zest adds brightness that bottled extract simply can't match, and it's where half the magic lives.
- Cold unsalted butter (1/2 cup): Keep it genuinely cold straight from the fridge; warm butter makes dense scones instead of flaky ones.
- Heavy cream (2/3 cup, plus extra for brushing): Richer and more forgiving than milk, it creates a tender crumb that holds up to the fruit without falling apart.
- Large egg (1): Adds richness and helps bind everything just enough.
- Pure vanilla extract (1 teaspoon): A subtle backbone that lets the orange and cranberry take the spotlight.
- Powdered sugar and fresh orange juice (for optional glaze): Fresh juice makes all the difference in the glaze—bottled tastes flat by comparison.
Tired of Takeout? 🥡
Get 10 meals you can make faster than delivery arrives. Seriously.
One email. No spam. Unsubscribe anytime.
Instructions
- Set your oven and prepare:
- Preheat to 400°F and line a baking sheet with parchment paper so your scones don't stick and get that beautiful golden bottom.
- Mix the dry foundation:
- Whisk flour, sugar, baking powder, and salt together in a large bowl. Take a moment to combine them fully so the baking powder distributes evenly.
- Work in the cold butter:
- Add your cold butter cubes and use a pastry cutter or your fingertips to work them in until the mixture looks like coarse breadcrumbs. This creates the little pockets of butter that become flaky layers as they bake.
- Fold in the fruits and zest:
- Stir in the cranberries, candied orange peel, and fresh orange zest until they're scattered throughout evenly.
- Combine wet ingredients separately:
- In another bowl, whisk together cream, egg, and vanilla until smooth. This keeps you in control before mixing everything together.
- Bring dough together gently:
- Pour the wet mixture over the dry ingredients and fold together with a spatula using as few strokes as possible—your goal is a shaggy dough, not a smooth one. Overmixing here is what turns tender scones into hockey pucks.
- Shape the dough:
- Turn it onto a lightly floured surface and gently pat it into a disc about 1 inch thick. The dough will be slightly sticky and that's perfect—it means there's enough moisture for tender crumbs.
- Cut into wedges:
- Using a sharp knife, cut the disc into 8 equal wedges like you're slicing a pie. Dip your knife in flour between cuts if it sticks.
- Arrange and glaze:
- Place wedges on your prepared baking sheet with a bit of space between them and brush the tops with a little extra cream. This creates that gorgeous golden sheen while they bake.
- Bake until golden:
- Bake for 16 to 18 minutes until the tops are deep golden brown and a toothpick comes out clean. The timing depends on your oven, so start checking at 15 minutes.
- Cool properly:
- Let them cool on a rack so steam escapes instead of making them soggy.
- Add the glaze (optional):
- Whisk powdered sugar with fresh orange juice until it reaches a drizzleable consistency and drizzle over cooled scones if you want extra sweetness and citrus punch.
 Save
Save There's something about these scones that transforms a simple breakfast into something worth lingering over. My family has claimed them for every special occasion since that first brunch, and I've stopped apologizing for making them twice a month.
Why These Scones Stand Apart
The candied orange peel does something unexpected—it brings a sophisticated bittersweet note that keeps these from feeling overly sweet, while the fresh orange zest adds brightness that makes your mouth feel alive. Most scones sit heavy on your plate, but these stay light because the balance of wet to dry ingredients is just right, and because you're not overworking the dough into submission. The cranberries contribute tartness that plays beautifully against the sweetness, creating complexity that tastes like you fussed for hours when you actually just needed a quick hand and good instincts.
Timing and Temperature Matter
Oven temperature isn't arbitrary—400°F is hot enough to set the structure quickly while keeping the inside tender before the outside browns too much. I learned this the hard way when I tried 375°F and ended up with pale, dense scones that tasted like something was missing. The 16 to 18 minute window is generous enough that you don't need to hover anxiously, but not so long that you can forget about them entirely. Every oven has its own personality, so the first time you make these, stay nearby at the 15-minute mark and watch for that deep golden color.
Make-Ahead Magic and Storage
These scones freeze beautifully, which changed my life when I realized I could shape and freeze the wedges unbaked, then pop them straight into the oven whenever I wanted fresh scones without the planning. Baked scones keep well in an airtight container for three days, though I've rarely had any last that long. A quick 5 to 7 minute reheat in a 325°F oven brings back that just-baked warmth without drying them out, and if you're feeling luxurious, a light brush of cream before reheating makes them taste almost as good as fresh.
- Freeze unbaked wedges on a baking sheet before wrapping, so they don't stick together in the freezer.
- Add 1 to 2 minutes to the baking time if baking directly from frozen—no thawing needed.
- These pair beautifully with clotted cream, good jam, or even softened honey butter if you want to gild the lily.
 Save
Save These scones remind me that the best recipes are the ones you find yourself making again and again, not because they're on a list, but because people ask for them. There's real comfort in knowing you can pull something this lovely together whenever the moment calls for it.
Recipe Help & Answers
- → What is the best flour to use for these scones?
All-purpose flour provides the right balance of texture and structure, resulting in tender yet sturdy scones.
- → Can I substitute dried cranberries with other fruits?
Yes, dried cherries or golden raisins can be used for a slightly different but equally delicious flavor.
- → How do I achieve a flaky texture in these scones?
Keeping the butter cold and gently mixing dough until just combined helps create flaky, tender layers.
- → Is it necessary to brush the tops with cream before baking?
Brushing with cream encourages a golden, glossy finish and adds richness to the crust.
- → Can I prepare the dough in advance?
Yes, the dough can be refrigerated before baking to enhance flavor and make shaping easier.