 Save
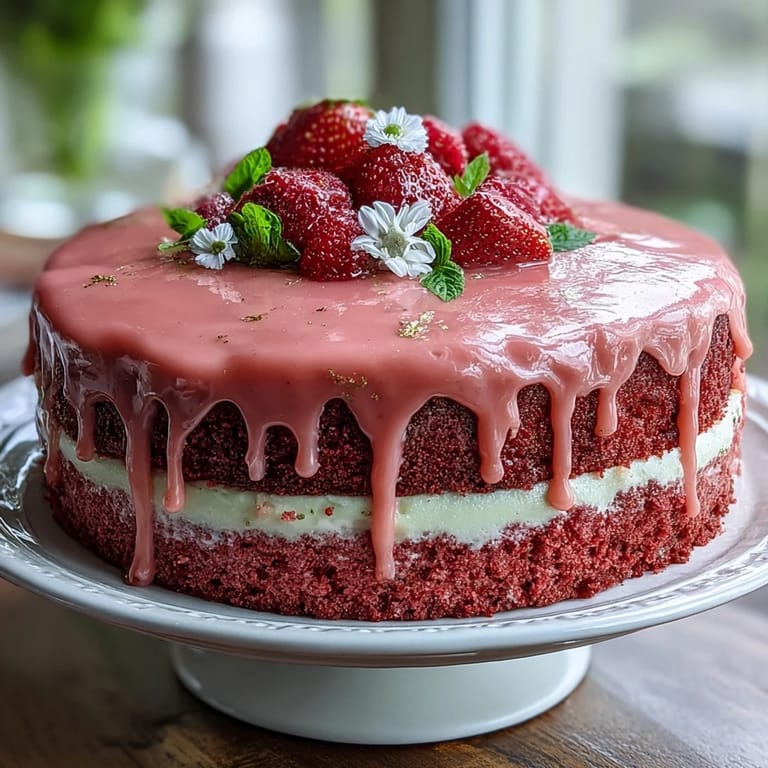
Save One spring morning, I found myself covered in sifted flour, towels strewn across the counters, and a bottle of rosé precariously perched near my stand mixer. The idea for this delicate Bridal Shower Rosé Velvet Cake came not from tradition, but from a streak of playful curiosity after sipping a just-chilled glass while prepping for a friend's party. The aroma of cocoa tinged with berries as I whisked together the batter surprised me, conjuring an old memory of watercolor invitations and laughter that colored the afternoon. The thrill of painting that final gold drip, hands trembling slightly, made it all a bit of an adventure. Sometimes baking becomes an act of celebration before the party even begins.
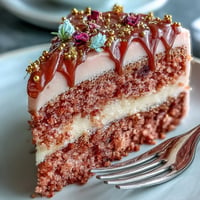
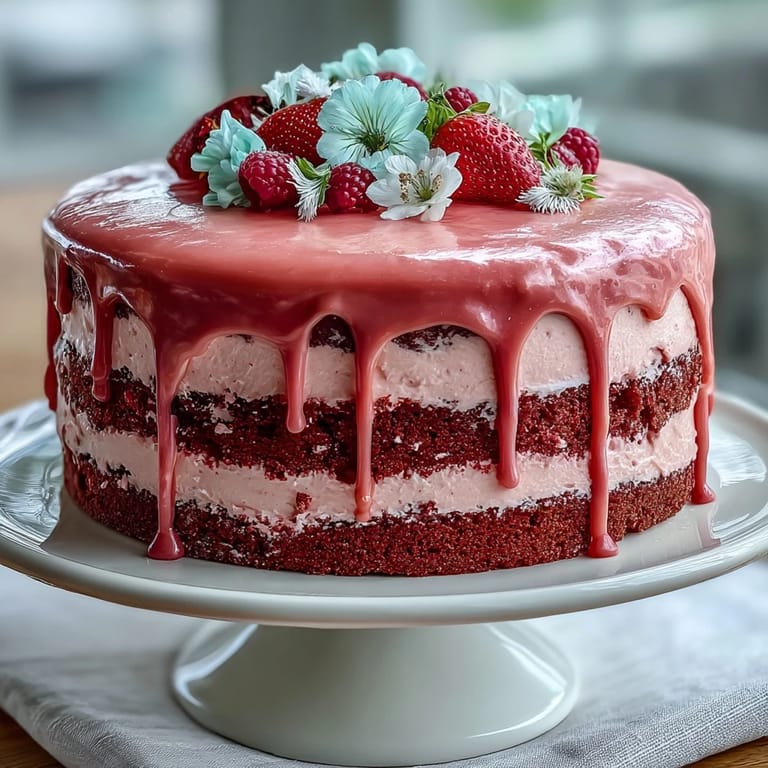
The first time I brought this cake to a bridal shower, there was an audible hush as I set it down—the golden drips catching sunlight, pink layers peeking out between billows of frosting. My hands had been shaking from both nerves and excitement, and in the background, someone cheered (for the cake, not just the bride). I never quite expected how much attention a homemade cake could steal. Years later, that memory still makes me grin when I reach for the edible luster dust. Sharing a slice always brings back the cacophony of forks and happy toasts.
Ingredients
- All-purpose flour: Gives the cake structure; I find sifting beforehand results in an extra light crumb.
- Granulated sugar: Lends sweet uniformity and balances the rosé's subtle tang; cream it well for the fluffiest batter.
- Baking soda & baking powder: Teamwork for rise and tenderness—double-check freshness for an airy bake.
- Salt: Sharpens the flavors so the rosé and cocoa shine in every forkful.
- Unsweetened cocoa powder: A hint enhances color and brings fullness to the blush-pink crumb.
- Unsalted butter: Softened is key for that dreamy, melt-in-your-mouth texture; don't rush when creaming.
- Buttermilk: Lends plush softness and a delicate tang; let it come to room temperature to blend smoothly.
- Rosé wine: The signature; I love a dry, fruity bottle for just the right whisper of wine flavor.
- Eggs: Room temperature helps create an emulsion that won't split the batter—yes, it matters here.
- Vanilla extract: Adds floral notes that tie the whole profile together.
- White vinegar: Ensures tender crumbs and brightens the cocoa's color.
- Pink food coloring gel: Add a little at a time for the perfect rosy hue without over tinting.
- Cream cheese: In the frosting, it balances sweetness with a slight tang—use it softened for perfect blending.
- Powdered sugar: Sift for cloud-like, lump-free frosting every time.
- Heavy cream & white chocolate chips: This duo makes a smooth, rich drip that decorates without overpowering.
- Edible gold luster dust & vodka/clear extract: A final brush of glamor; mix until just paintable to avoid drips.
Tired of Takeout? 🥡
Get 10 meals you can make faster than delivery arrives. Seriously.
One email. No spam. Unsubscribe anytime.
Instructions
- Set up for Success:
- Preheat your oven to 350°F and line three 8-inch round pans with parchment—the clatter of pans means cake is near. Greasing well saves you from those heart-stopping moments of stuck layers.
- Whisk the Dry:
- Sift flour, cocoa, baking soda, baking powder, and salt into a cloud; the fine cocoa dust always makes me smile (and sneeze if I rush).
- Cream Butter & Sugar:
- With your mixer running on medium, blend butter and sugar until light as whipped clouds—three minutes and it loses that grainy feel.
- Eggs & Flavor:
- Add eggs one at a time, scraping the bowl with a flexible spatula, then the vanilla for a fragrant lift.
- Rosé + Buttermilk Magic:
- Mix in buttermilk, rosé, and vinegar; the kitchen smells almost festive at this point.
- Batter Comes Together:
- Fold in the dry ingredients gently just until no streaks remain—overmixing here is the enemy of tenderness.
- Paint it Pink:
- Stir in pink gel a little at a time, watching the batter blush and swirl until it reaches your dream pastel.
- Bake with Care:
- Divide batter evenly (a scoop helps!), and bake 30–35 minutes until a toothpick emerges crumb-free and fragrant.
- Cool Completely:
- Let cakes cool in their pans 10 minutes, then transfer to racks and resist the urge to frost until they're cool to touch.
- Frost to Perfection:
- Beat butter and cream cheese smooth, gradually add powdered sugar until fluffy, then rosé, vanilla, and a pinch of salt.
- Layer and Crumb Coat:
- Level cakes if needed; start with one, spread with frosting, repeat, then sweep a thin crumb coat around and chill.
- Final Frosting:
- Frost the entire cake generously and smooth—embrace imperfections as part of the charm.
- Gold Drip Drama:
- Melt chocolate chips with cream, let cool, then drip over the edges with a spoon or bottle—feel free to gasp at your work.
- Paint the Gold:
- Mix luster dust with vodka until it just coats your brush, and dab the drips with gentle flair for instant glamour.
- Chill and Serve:
- Chill at least 30 minutes before serving; the anticipation builds as the gold sets.
 Save
Save  Save
Save The moment that sealed this recipe as a tradition was watching the bride, startled and laughing, swipe extra gold drip with her fingertip—cake etiquette be gone. It turned a beautiful centerpiece into the backdrop for wild, sparkling storytelling among friends.
Soft Cake Layers Without Stress
I learned quickly that letting all wet ingredients reach room temperature makes a huge difference in creating those dreamy, soft layers. Rushed mixing straight from the fridge led to a heavy cake, but patience always paid off with a silkier, even crumb.
Decorating Drama, Made Simple
The first time I tried painting the gold drip, I was nervous I'd mess up the final look. A gentle hand and a small, clean brush worked wonders and made streaks seem intentional—like abstract art on cake.
How to Make It Extra Special
Layering extra rosé between cooled layers or scattering edible flowers adds a signature touch everyone remembers.
- Let the cake sit out twenty minutes before serving for best texture and flavor.
- Keep toppings light—too many berries or flowers add moisture and can make the gold drip run.
- If using edible gold leaf, apply after chilling to keep it from melting.
 Save
Save 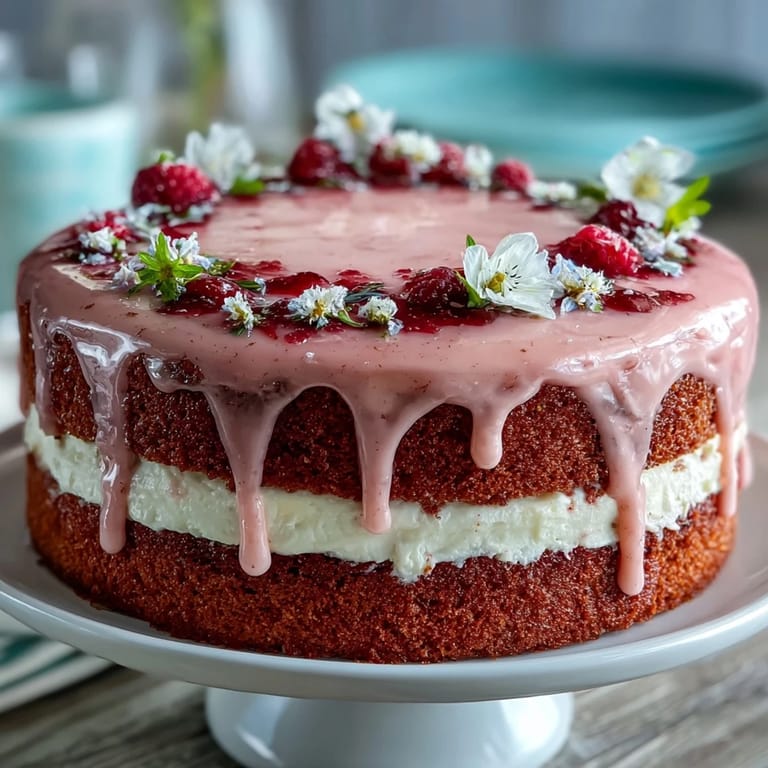 Save
Save There's no better way to celebrate than with a cake that glimmers and delights in every detail. Share a slice, and you'll see smiles brighten any gathering.
Recipe Help & Answers
- → How can I boost the rosé flavor?
Brush cooled cake layers with a little reserved rosé or a reduced rosé syrup to concentrate the flavor; for a non-alcoholic option, use sparkling grape juice or a light sugar syrup infused with grape juice.
- → How do I get an even blush-pink color?
Use a concentrated gel coloring and add a little at a time until you reach the desired shade. Mix gently to avoid overworking the batter and test a tiny spoonful before tinting all the batter.
- → What yields the smoothest cream cheese frosting?
Ensure butter and cream cheese are fully softened, sift the powdered sugar, and beat until light. Chill briefly for a firm crumb coat, then apply a final chilled layer and smooth with an offset spatula.
- → How do I achieve a controlled gold drip?
Make a pourable white chocolate ganache (white chocolate + warmed cream), cool to room temperature so it's thick but pourable, then apply drips with a spoon or bottle. Paint with edible gold luster mixed with a clear spirit for shine.
- → Can this be made ahead?
Yes. Bake layers a day ahead and wrap well, or freeze layers. Assemble and frost the day before, chill overnight, then add the chocolate drip and gold painting the day of service for best finish.
- → Any tips for slicing and serving clean slices?
Chill the finished cake at least 30 minutes before cutting. Use a hot, dry knife (dip in hot water and wipe between cuts) and let slices sit a few minutes at room temperature for optimal texture.